

Hey there! I hope you are doing well. I am writing this blog post right after configuring a pipeline on AWS. Please note that this is mainly focused on folks who are just trying to build some basic projects (learning specifics) around the AWS cloud. If you're someone who already has some real-time experience working with AWS, this may appear understated. So, if you are just trying to experiment with the AWS services and trying to connect the dots between theory and real-world applications on the AWS cloud, I trust you will discover something insightful from this.
Before we build our first pipeline on AWS, let's get some things ready. Well, I'm guessing by now you already know what a data pipeline is. So, in this, I'll walk you through setting up an "Automated Pipeline Using Lambda, S3, and Glue." It's pretty straightforward; we will be working on a pipeline that flattens the JSON files that are uploaded in an S3 source bucket and converts them into CSV files in another S3 destination bucket. In other words, it's a data pipeline that gets triggered when new data is uploaded to an S3 bucket, processes the data using AWS Glue, and stores the transformed data in another S3 bucket. It's very simple, isn't it? Alright, let's do this anyway. Before we jump in, make sure you have the basic prerequisite in place: an AWS account. We shall break down the entire process step-by-step, so you can refer back to the previous steps in case you get stuck somewhere.
Step 1:
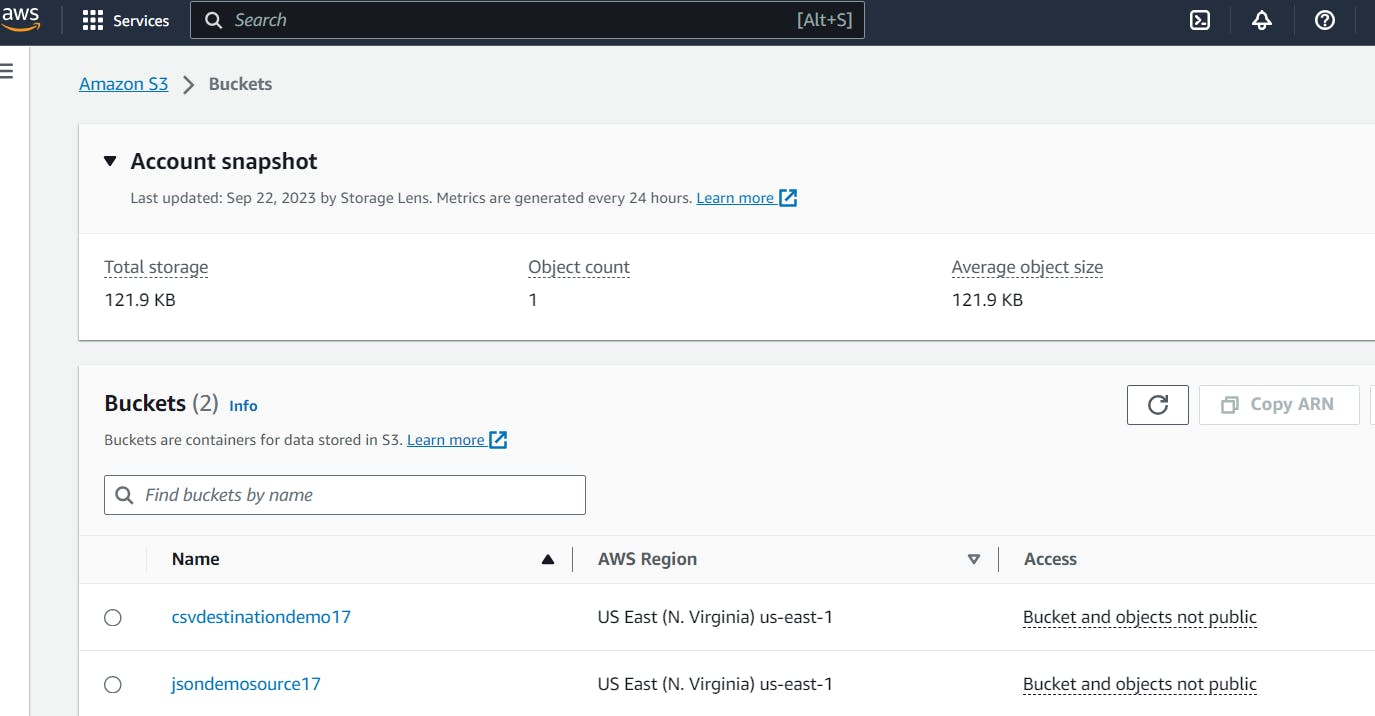
Our first step involves creating two S3 buckets: a source bucket and a destination bucket. To do this, open up the management console and head over to the S3 section, and in the drop-down menu, select "buckets" and hit on "create bucket." Now, we enter our desired bucket name; in my case, it's "jsondemosource17". Note that all the bucket names in S3 are globally unique. So, you might need to enter a different one on your end.
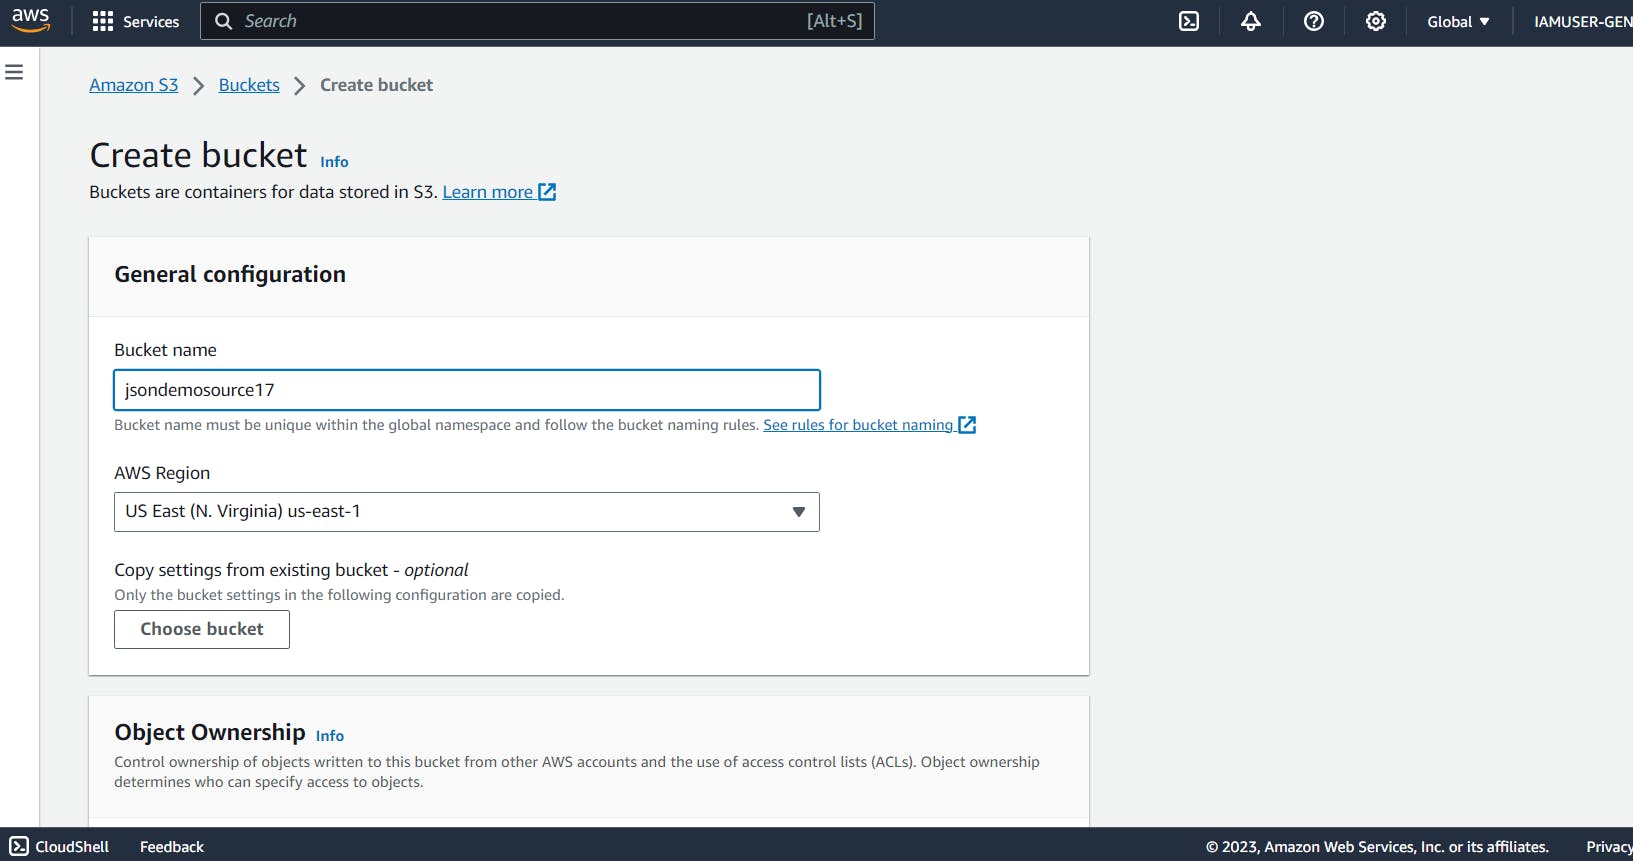
After you enter the bucket name, scroll down to the bottom of the page, and you can leave all the default settings as they are and hit on 'create bucket'. In the same way, create another bucket, the destination bucket, where we will be storing our new CSV files. After you do this, make sure you have finished setting up the two S3 buckets.
Step 2:
Now, we create an IAM role for our Lambda function that gets invoked when a new JSON file lands in the S3 source bucket. In the search bar, enter "IAM," and in the drop-down menu, select "Roles" and hit 'Create Role'. Here, we select the AWS service as "Lambda" and hit next. In the permissions tab, select the following permissions: AmazonS3FullAccess, AWSGlueConsoleFullAccess, and CloudWatchEventsFullAccess.

Finally, after attaching the necessary permissions, give a name to the role and hit on 'Create role'. This completes the role creation for the Lambda function.

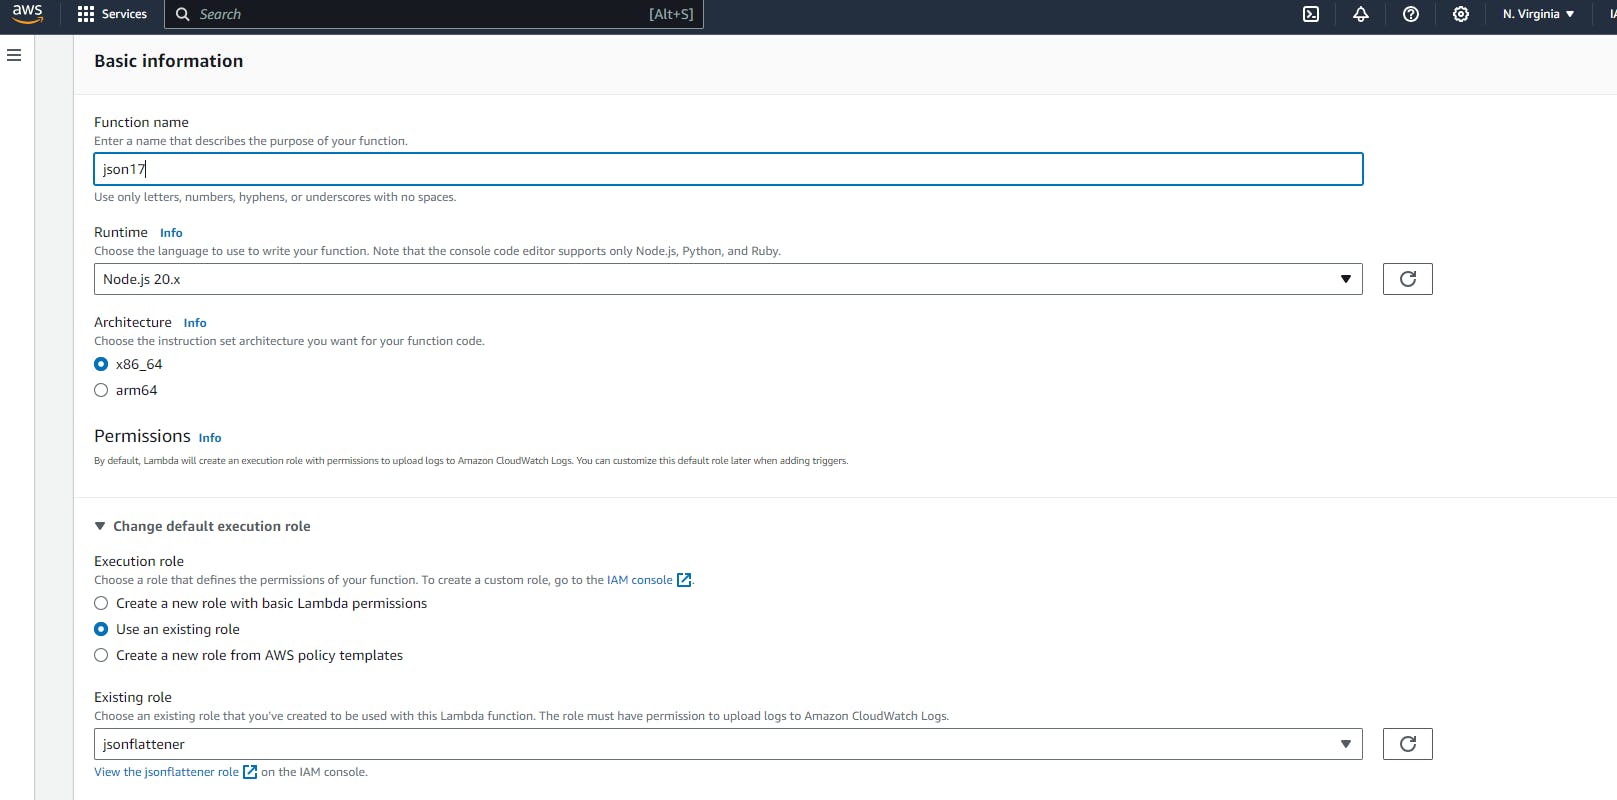
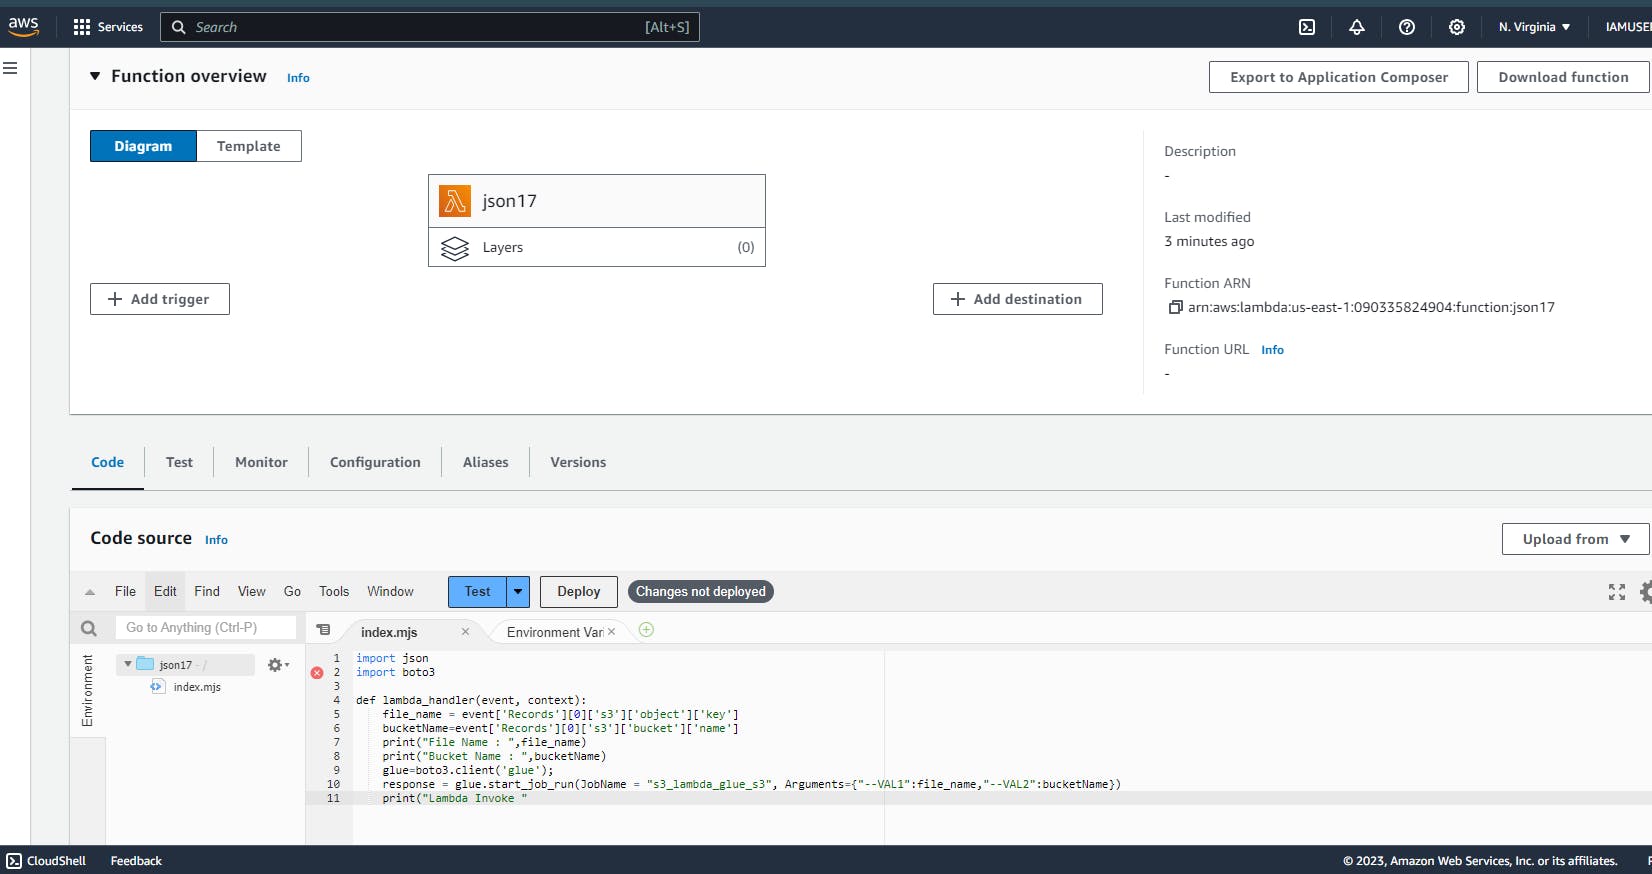
It's time to create the lambda function (I chose Python). Just like the above steps, head over to the search bar and type in 'Lambda', and in the drop-down menu, find 'functions' and press on 'create function'. Now, give the function a name, and in the "Change Default Execution Role" settings, click on "Use an existing role" to select the role that you've just created before this and hit the create function. It's time to enter the Lambda code in the 'code' section.
You can write or modify the code in your preferred programming language; otherwise, you can just copy-paste the code below.
import json
import boto3

def lambda_handler(event, context):
    file_name = event['Records'][0]['s3']['object']['key']
    bucketName=event['Records'][0]['s3']['bucket']['name']
    print("File Name : ",file_name)
    print("Bucket Name : ",bucketName)
    glue=boto3.client('glue');
    response = glue.start_job_run(JobName = "s3_lambda_glue_s3", Arguments={"--VAL1":file_name,"--VAL2":bucketName})
    print("Lambda Invoke")
After you enter the code for the Lambda function, click on 'deploy'. This will deploy the lambda function.
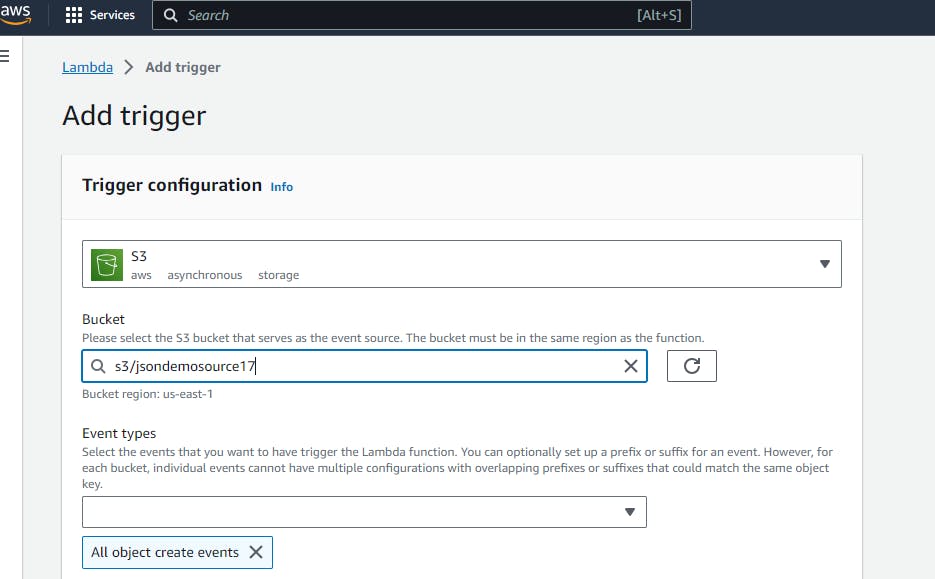
Now, it's time to add a trigger to our lambda function, which means that this function will get triggered when there are any changes to the files under the respective trigger. Here, our trigger is the S3 Source bucket. So, click on "Add trigger" and select the trigger as 'S3', and the bucket would be the source bucket that we've created in step one.
This completes: Attaching an IAM role to our lambda, creating a lambda function, and adding a trigger to it

Step 3:
By now, we have created the S3 buckets, lambda function, and trigger. Now, it's time to get going with the setting up of the glue job using the AWS service AWS Glue. But before we do that, we need to create a role for the glue job. It's almost similar to the process we used in step 2 (while creating a role for the lambda function). So, just go ahead and create an IAM role for the glue job. I've created mine as follows:

Note that we have only created an IAM role for the glue job. Now, we create a glue job using the service AWS Glue. For that, just as mentioned in step 2, head over to the search bar and search for "AWS Glue." In the drop-down menu, look for jobs and create a new job. Please note that the name of the glue job should match the name that we have specified in our Lambda function. You may leave the rest of the settings as default. At this point, we can skip the "Add connections" part and move ahead and click on " Save and Edit Script." After we create a glue job, we must add the required code. You can directly copy the code (in Python) from the snippet below or modify it accordingly.
import sys
from awsglue.transforms import *
from awsglue.utils import getResolvedOptions
from pyspark.context import SparkContext
from awsglue.context import GlueContext
from awsglue.job import Job
from pyspark.sql.functions import *
from pyspark.sql.types import *
from pyspark.sql import SparkSession
spark = SparkSession.builder.getOrCreate()

def read_nested_json(df):
    column_list = []
    for column_name in df.schema.names:
        if isinstance(df.schema[column_name].dataType, ArrayType):
            df = df.withColumn(column_name,explode(column_name))
            column_list.append(column_name)
        elif isinstance(df.schema[column_name].dataType, StructType):
            for field in df.schema[column_name].dataType.fields:
                column_list.append(col(column_name + "." + field.name).alias(column_name + "_" + field.name))
        else:
            column_list.append(column_name)
    df = df.select(column_list)
    return df

def flatten(df):
  read_nested_json_flag = True
  while read_nested_json_flag:
    df = read_nested_json(df);
    read_nested_json_flag = False
    for column_name in df.schema.names:
      if isinstance(df.schema[column_name].dataType, ArrayType):
        read_nested_json_flag = True
      elif isinstance(df.schema[column_name].dataType, StructType):
        read_nested_json_flag = True;
  return df;

def main():
    @params: [JOB_NAME]
    args = getResolvedOptions(sys.argv, ["VAL1","VAL2"])
    file_name=args['VAL1']
    bucket_name=args['VAL2']
    print("Bucket Name" , bucket_name)
    print("File Name" , file_name)
    input_file_path="s3a://{}/{}".format(bucket_name,file_name)
    print("Input File Path : ",input_file_path);

    df = spark.read.option("multiline", True).option("inferSchema", False).json(input_file_path)
    df1=flatten(df)
    df1.coalesce(1).write.format("csv").option("header", "true").save("s3a://destinationflattenjson/{}".format(file_name.split('.')[0]))

main()
If you wish to learn more about AWS Glue and its workings and use cases, refer to: AWS Glue
Well, this step completes everything that we need to set up to get the pipeline working. It's time to test the pipeline that we have built by adding a JSON file to the S3 source bucket. Let's analyze the workings of the pipeline.
Testing the Pipeline
You can test the pipeline by just going through the steps as follows:
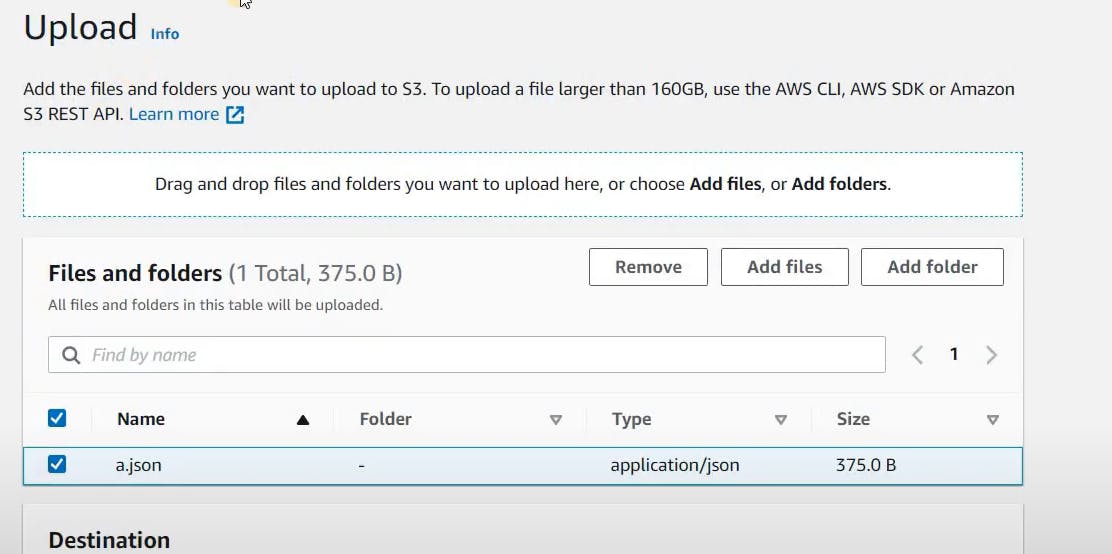
Upload a JSON file to the S3 source bucket.
Check if the Lambda function is triggered by going through the status of the CloudWatch logs. If you can spot the lambda function trigger in the CloudWatch logs, then it's working fine. Continue to the next step.
See if the Glue job we've set is up and running

Verify the destination bucket to see if there is a flattened version of the JSON file we have uploaded.
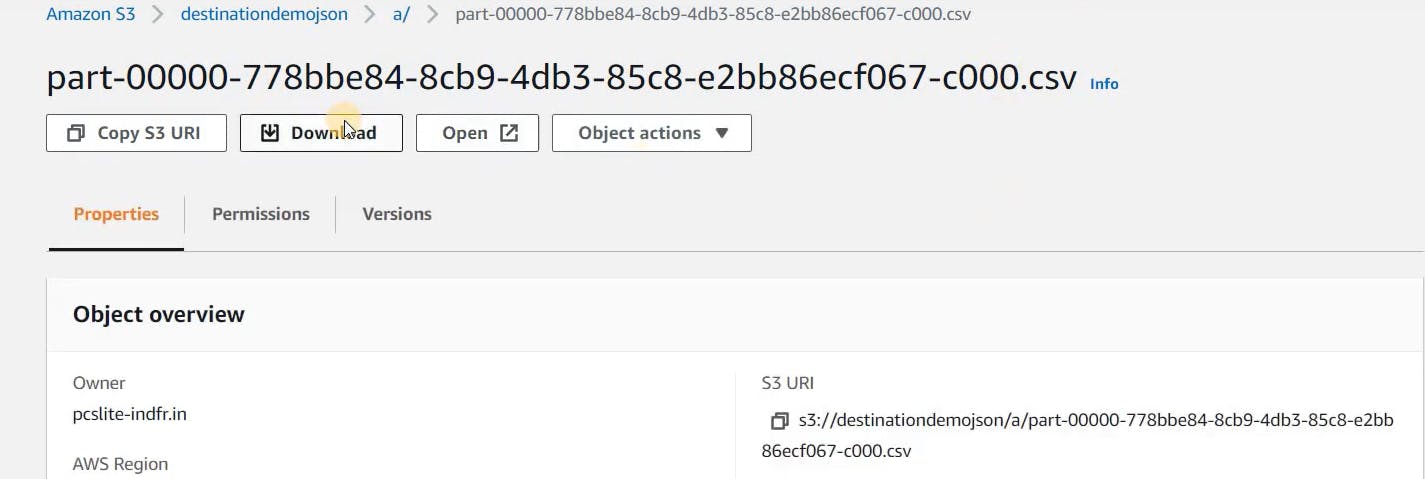
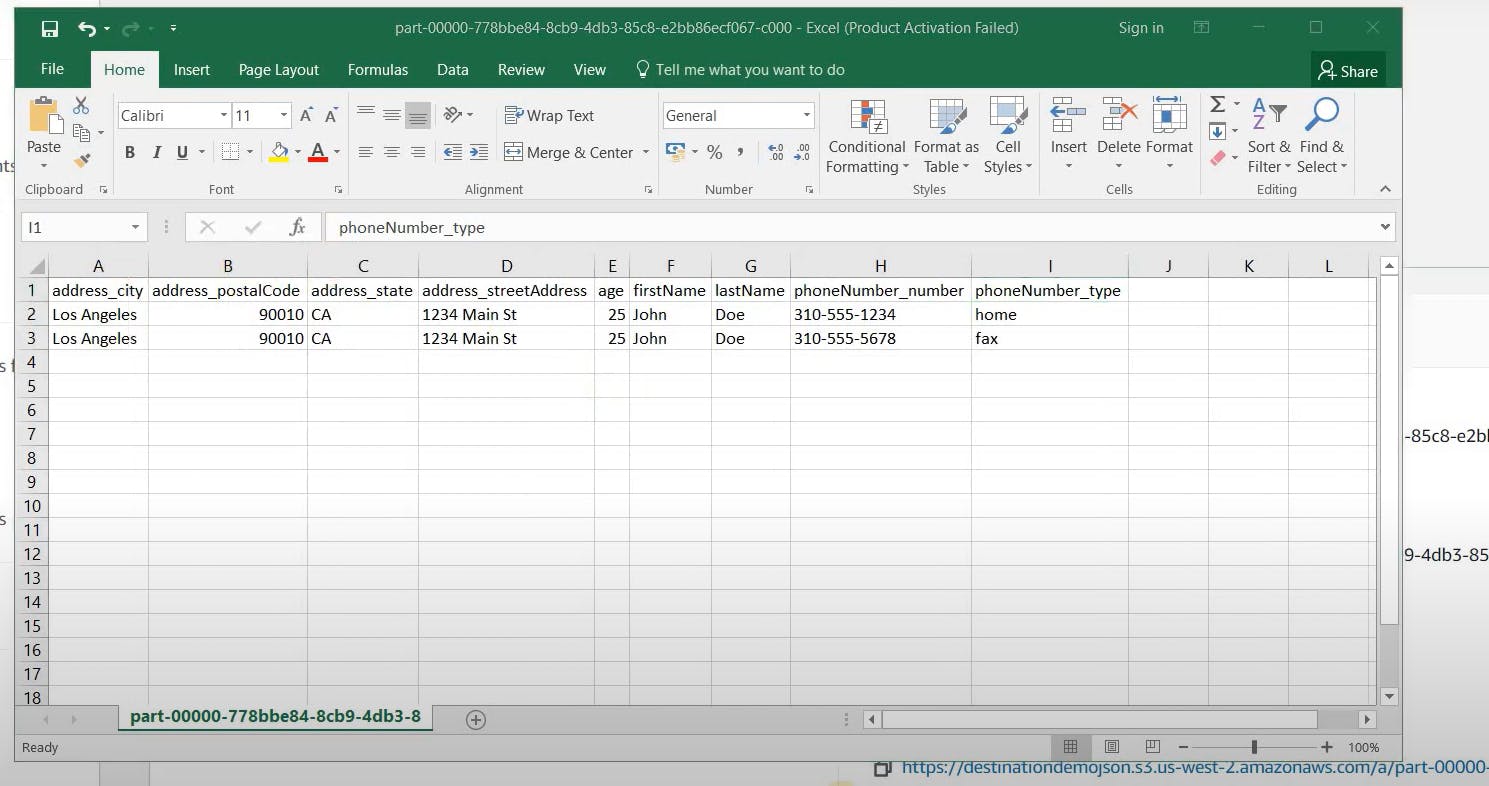
In the image above, we can observe that the JSON file we uploaded to the source bucket has been automatically transformed into a CSV file in the destination bucket. This indicates that our pipeline is working successfully.
Yay! Good work! You've just set up your first pipeline on AWS.
Recommended Cleanup (Optional)
Now that we have successfully created our first pipeline on AWS after experimenting with a few services here and there, It's time to delete and terminate the services to avoid any surprises in the future.
Thanks for reading!